


Table of Contents
1) How to take screenshot on your Mac system
Screenshots are useful while working at the office. You can send an error message to the IT department by taking a screenshot. You can take merely a portion of the screen, a window, or an entire screen. Every operating system including Windows, macOS, Android, and iOS brings several ways to capture the screen.
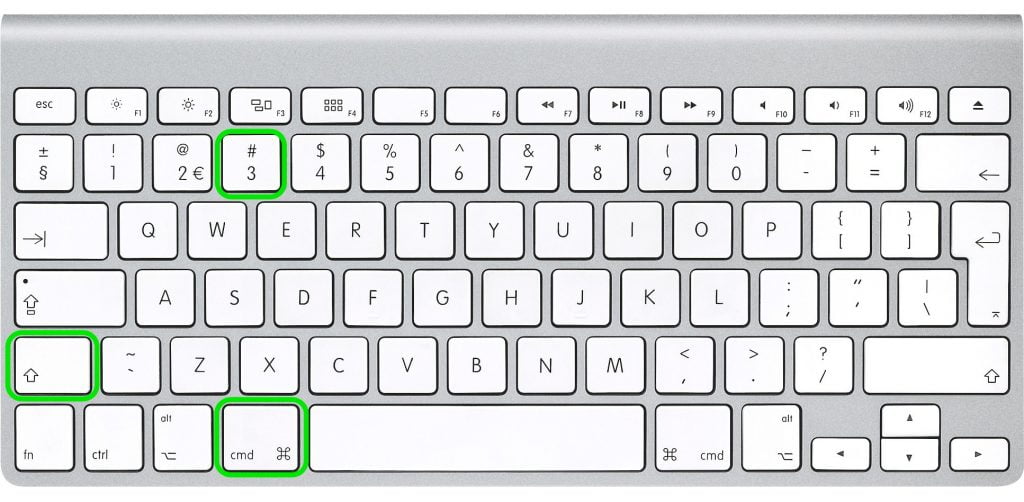
To take a screenshot, press and hold three keys Shift, Command, and 3 keys together. You can find a thumbnail in the corner of your screen, click it to edit the screenshot, and save it to your desktop.
Where would screenshots be located ?
Screenshots, by default, save to your desktop with the name and date with file extensions.
Capturing a portion of the Screen on Mac
- Press and hold Shift, Command, and 4 these three keys together. And drag the crosshair to choose the area of the screen to capture.
- Press and hold the Space bar while dragging to move the selection.
- Press the Esc key to cancel the screenshot that is being taken.
- Release your mouse to take the screenshot. You can edit the screenshot with help of a thumbnail in the corner of your screen. Or else wait for the screenshot to save on your desktop.
2) How to Take Screenshot on windows 10 ?
Taking screenshots of the entire screen or part of your screen is pretty simple and easy. There are several ways to get a screenshot in windows. In Windows 7, and later versions of Windows operating systems a couple of built-in tools are there to get screenshots. They are Snip & Sketch, Snipping Tool, and using Keyboard shortcuts for screenshots.
Snip & Sketch
The Snip & Sketch tool has been launched in Windows 10 by Microsoft to get screenshots.
Snip & Sketch tool can be used in Windows 10 and later versions of Windows to get screenshots. It’s easy to share screenshots. The shortcut to use the Snip & Sketch tool is to hold the Windows key, Shift, and S keys together. If you can’t use the shortcut, then you can use the Snip & Sketch tool directly from the Start button in the notification panel where it shows as Screen snip.
Snipping Tool
Windows Vista and later versions of Windows operating systems, you can find the Snipping Tool in the list of apps from the Start menu. If you don’t find it in the list of apps, you can search it in the search bar. when you start Snipping Tool, with the symbol ‘+’, the screenshots get saved automatically. You need to save them automatically before you close them. It gets copied to the clipboard automatically.
Print Screen
Press the key Print Screen (PrtSc appears on keyboard) to capture the entire screen. It will be copied to the clipboard. It has to be saved on an image editing tool like MS Paint, paste the screenshot in it, and save the file with file extensions from there.
Alt + Print Screen
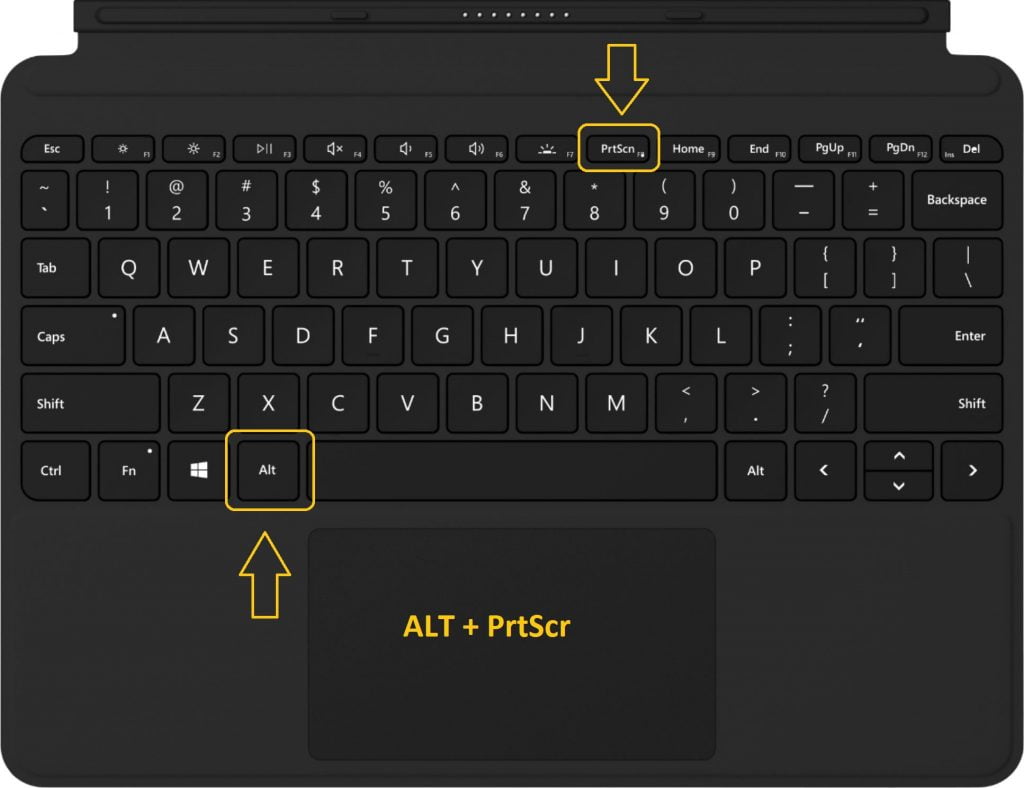
Use the keyboard shortcut Alt + PrtScn to get a screenshot of the current window and copy this screenshot on an image editor tool to save it with any name of the file extension. I hope you got idea about How to take screenshot on both mac and Windows 10 now.
Also Check:- How To delete a Facebook Account 2021


